Chainmail Guide · 01
European 4-in-1.
The oldest chainmail weave. More than two thousand years of armour, cathedrals of rings, and, now, very fine jewelry. Every ring passes through four neighbours. Once you learn it, every other weave makes sense.

What you are building: a small piece of European 4-in-1 mesh
Ring specifications
- Aspect ratio
- 5.14
- Inner Ø ÷ wire Ø
- Outer diameter
- 10 mm
- Wire thickness
- 1.4 mm
- Material
- Stainless steel
A note on AR
AR = Inner Ø ÷ Wire Ø
= 7.2 mm ÷ 1.4 mm = 5.14
Our rings are 10 mm outer diameter, so the inner (the hole you see) is 10 − 2·1.4 = 7.2 mm. European 4-in-1 runs from roughly AR 3.0 (tight, armour-weight) up to AR 7.0 (loose, flowy). AR 5.14 lands right where E4-1 bracelets and chokers want to be: mesh holds the mouse-ears pattern, rings still flex on skin.
What you need
Jump rings
Stainless steel, 10 mm OD, 1.4 mm wire. Rough counts: 150 to 200 for a bracelet, 400 to 500 for a choker, 700+ for a wide cuff. Always buy a handful of spares.
Two pairs of pliers
Flat-nose or chain-nose, one in each hand. Avoid ridged jaws; they mark the metal. Bent-nose is fine.
Optional but useful: a small tray or bowl to keep open and closed rings separated. Tape one side of the table for grip.
Learn these four words first
Closed ring
A ring whose ends sit flush against each other. No gap. You cannot thread anything new into it.
Open ring
A ring whose ends have been twisted sideways (not pulled apart) to create a small gap. You thread other rings onto this ring, then close it again. Jump rings come cut from a tight coil, so the two ends already sit at slightly different heights, ready to weave through other rings.
Aspect ratio (AR)
Inner diameter divided by wire thickness. A single number that tells you how loose or tight a weave will feel. Your rings are 10 mm outer diameter with 1.4 mm wire, so the inner diameter is 10 − 2·1.4 = 7.2 mm. AR = 7.2 ÷ 1.4 = 5.14.
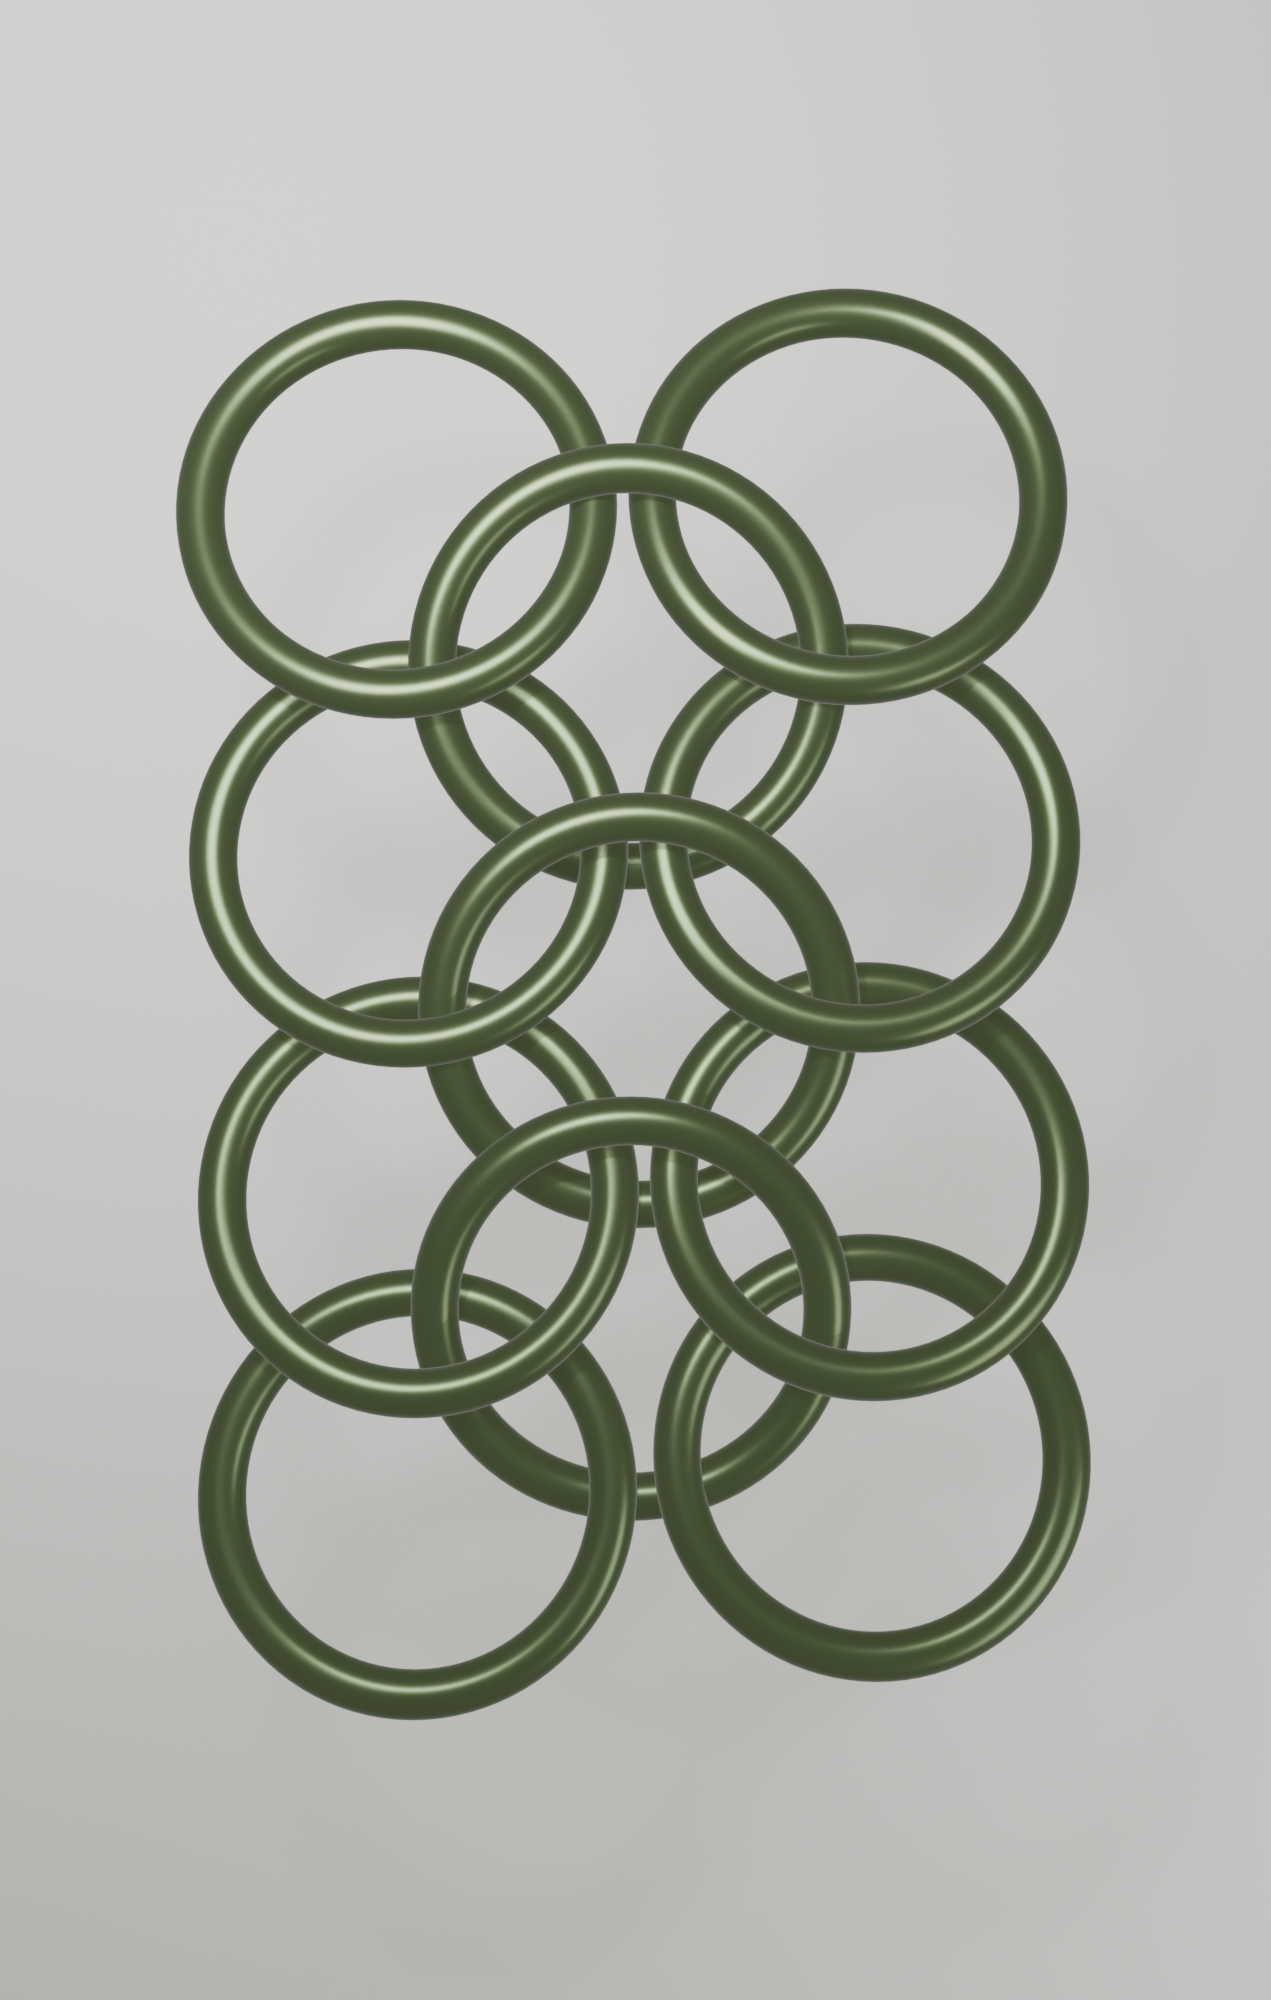
Mouse ears
Lay a row of European 4-in-1 flat on the table. Two closed rings slant up and outward at each unit, like Mickey Mouse ears. Spotting them is how you know your weave orientation is correct. Once you see them, you cannot un-see them.
The method
There are two common ways to weave European 4-in-1. In this guide we use the continuous-growth method: build one unit, then extend it ring by ring. Open a new ring, thread it through the far end of what you already have, slide two more closed rings onto it, close. Repeat. The weave grows under your hands like knitting. No detached pieces. No seams. This is how experienced weavers work, and it stays tidy even for very large projects.
The weave, step by step
How to read the diagrams
In every illustration, the gold ring is the one you are working with right now. The sage rings are the ones already woven.
Prepare your rings.
Close four rings: hold each between two pliers, one on each side of the gap, and gently twist your wrists toward each other until the ends meet flush. Open one ring by twisting the ends sideways, not pulling them apart. A 2 mm gap is enough.
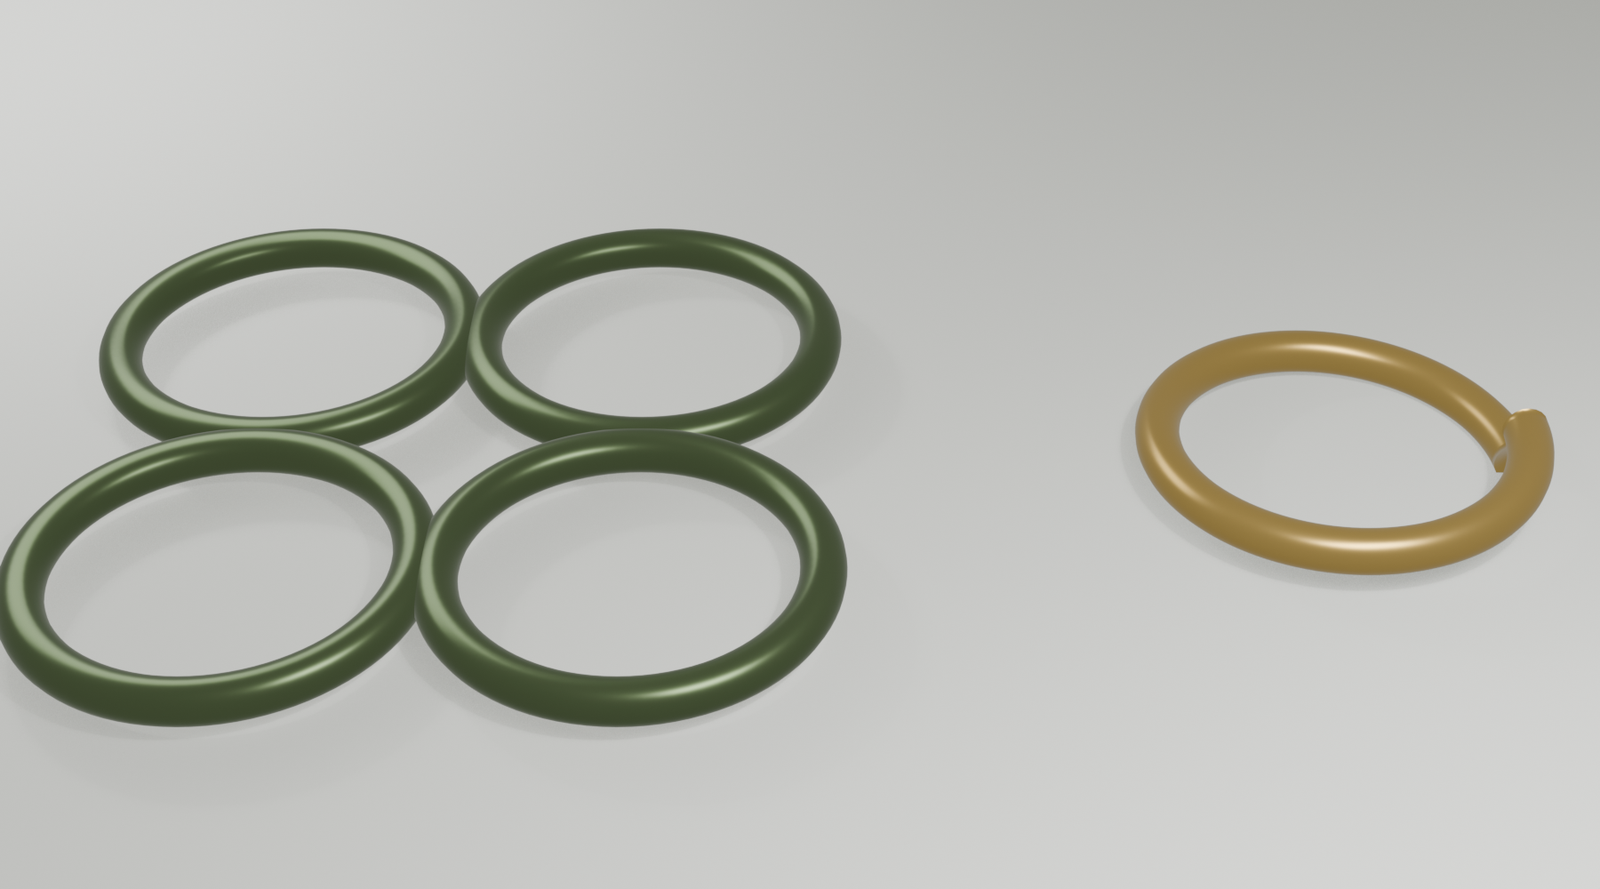
Thread four closed rings onto the open one.
Slide all four closed rings over the open ring, one at a time. They will hang loose and overlap. That is fine. Keep the open ring held firmly between the pliers so it does not close prematurely.
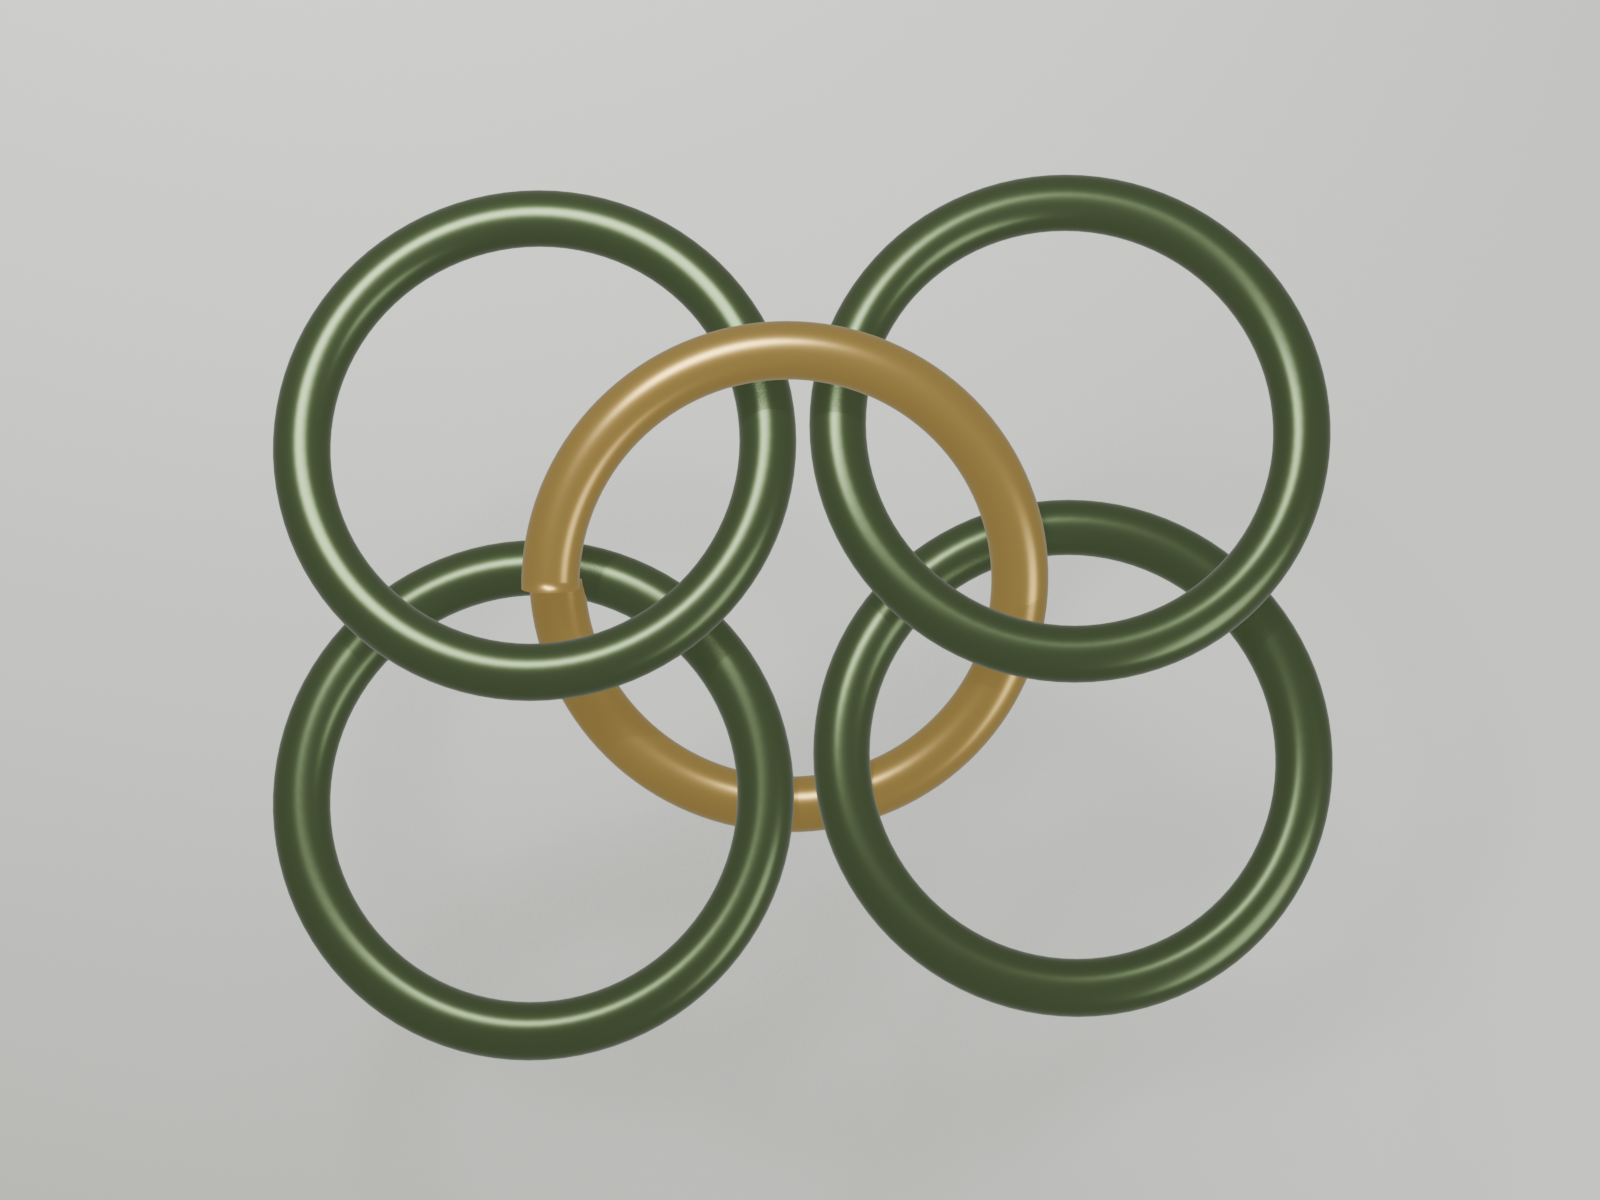
Close the ring. Your first unit is done.
Twist the ends back together until they meet flush. You now have one ring holding four. Lay it flat on the table: two of the four closed rings fan up and outward, your first mouse ears. The other two lie underneath, pointing the opposite way. This orientation matters for every ring that follows.
Attach a new open ring through the two end rings.
Here is the trick that makes the weave continuous. Take a fresh open ring. Thread it through the two closed rings at one end of your unit (the two mouse-ears, or the two underneath, either end works; be consistent). Do not close the ring yet. It is hanging off the unit by itself, ready to accept more closed rings.
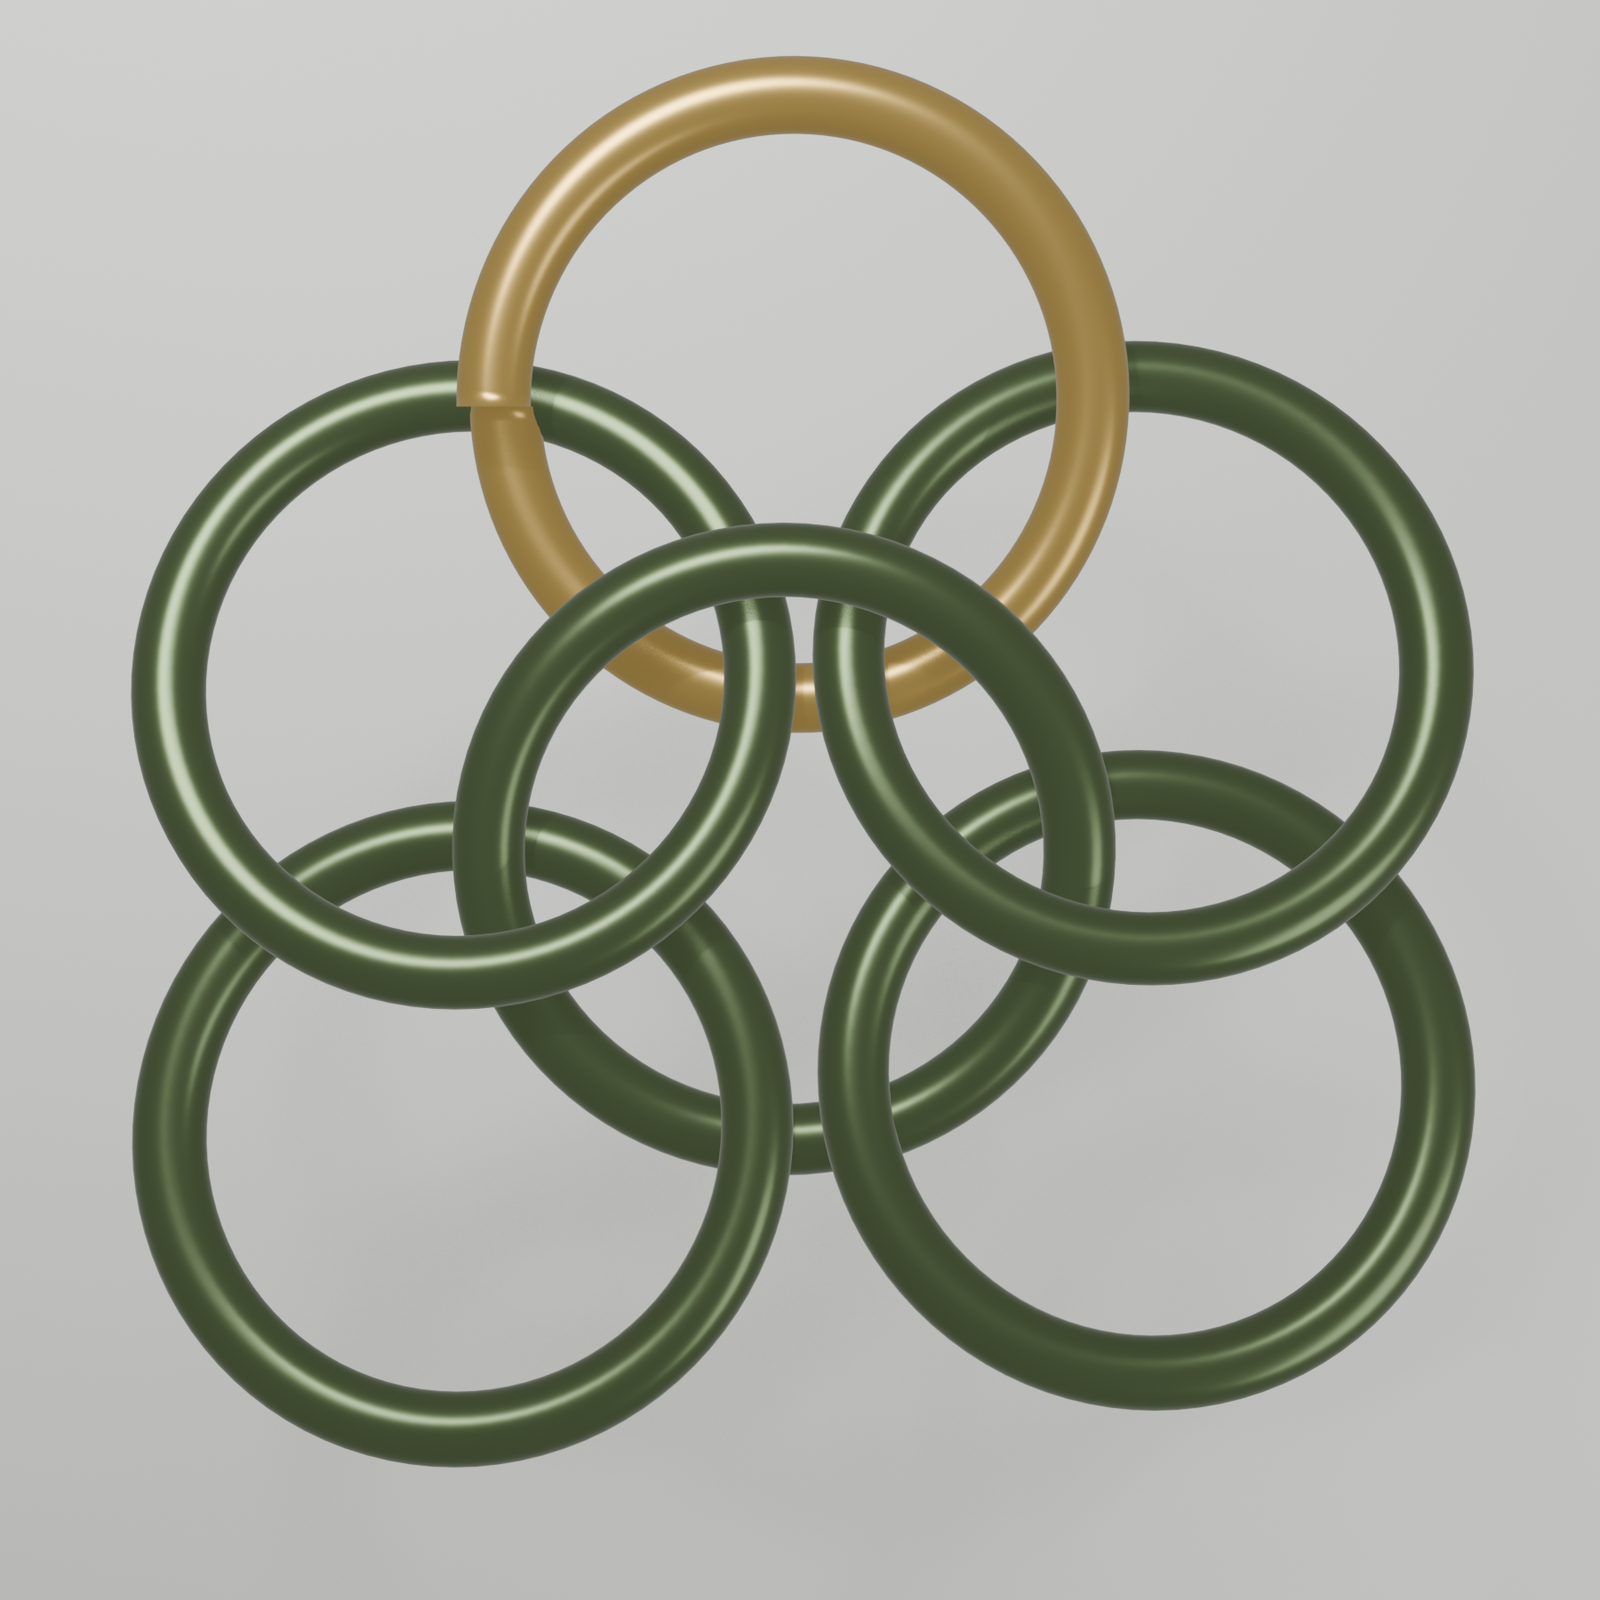
Add two more closed rings, then close.
Still holding the open ring, slide two fresh closed rings onto it. Close the ring. That ring is now the centre of your second unit: two old rings on one side, two new rings on the other. You have just grown your weave by one full unit without ever building a detached block.
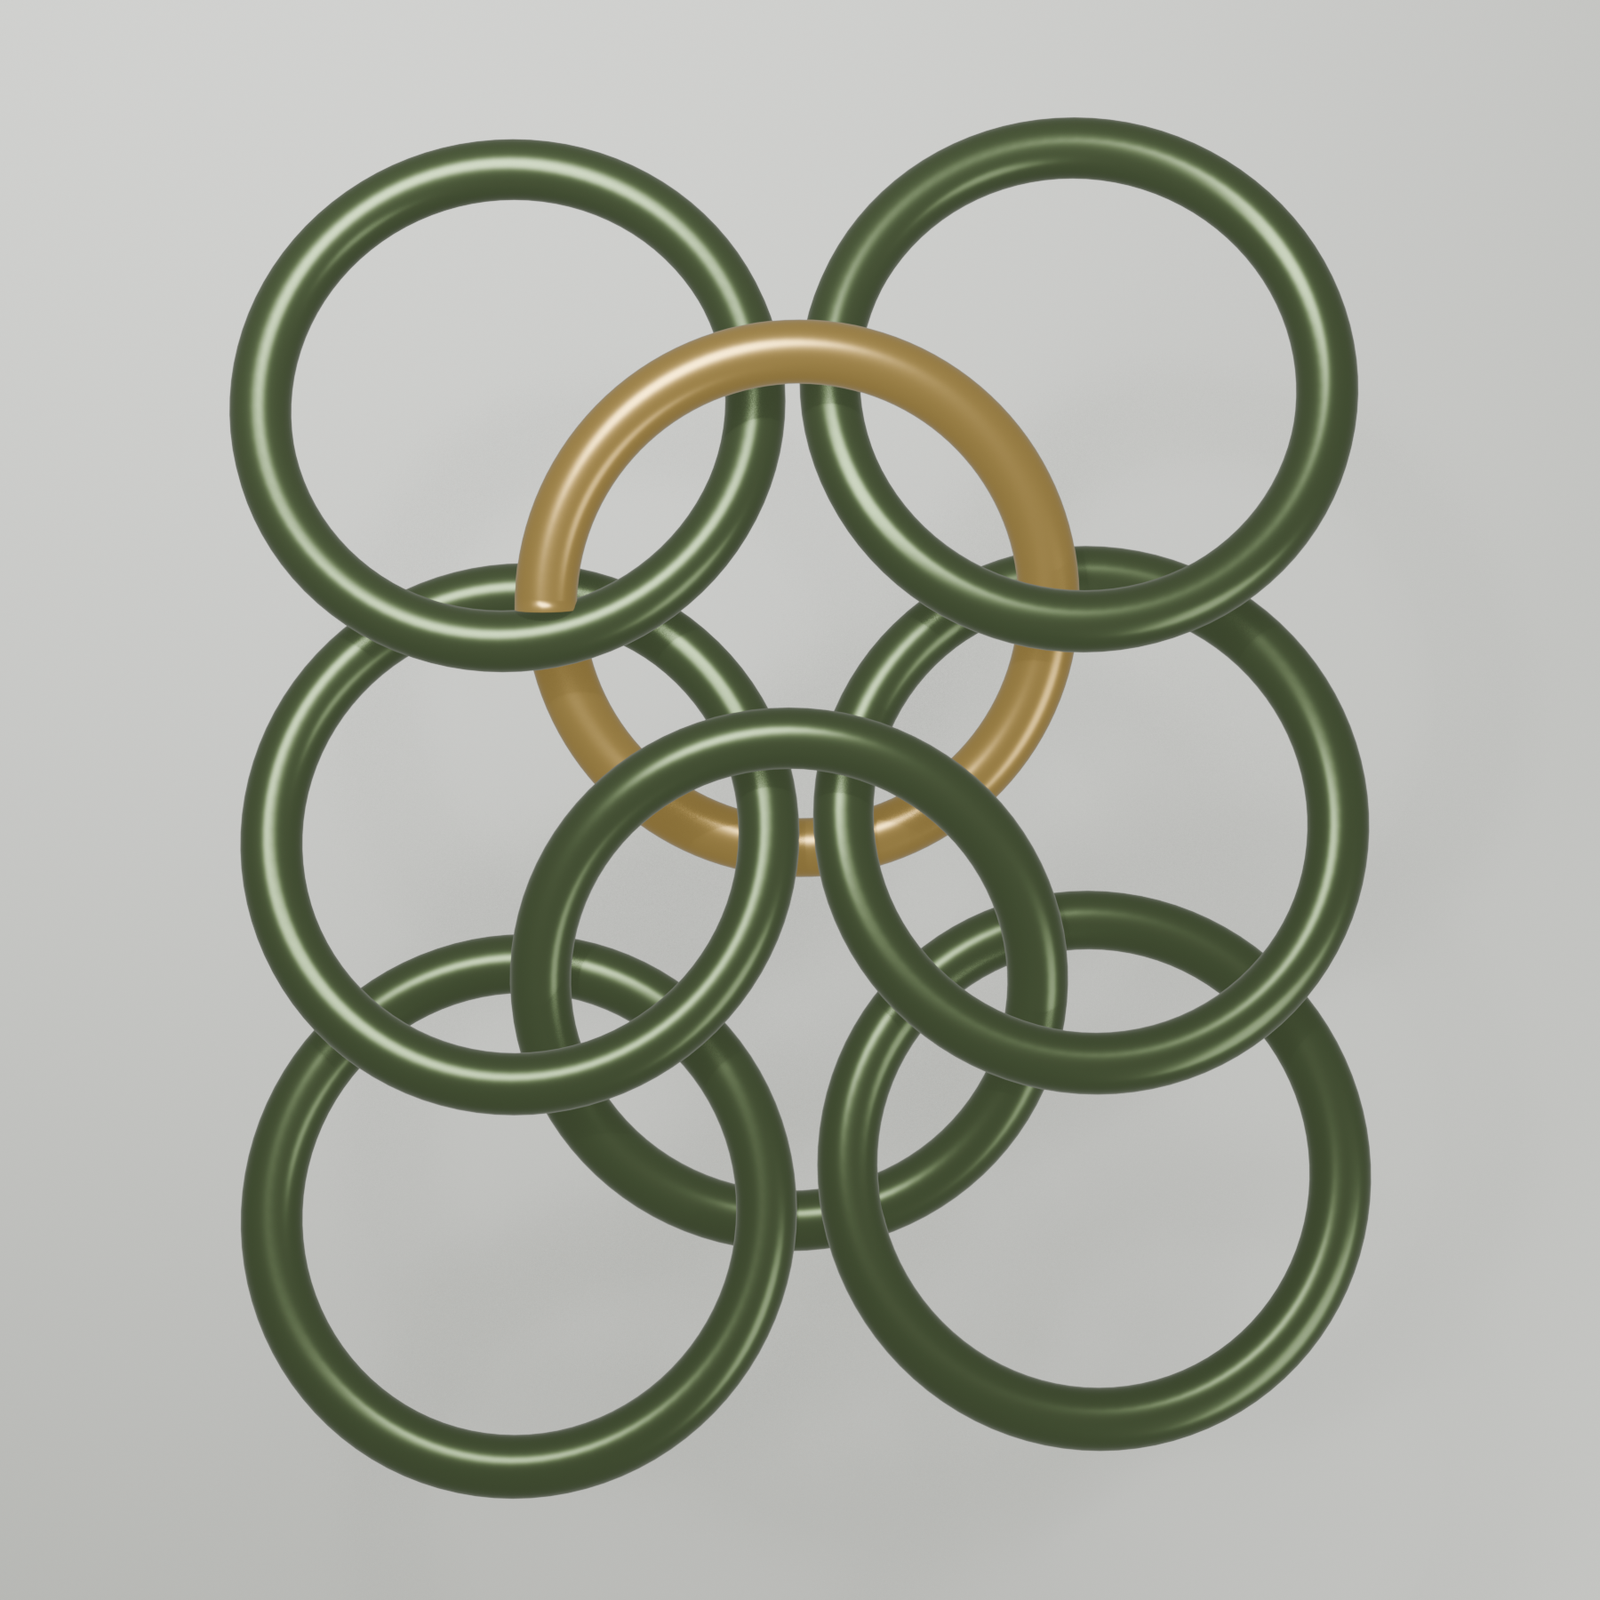
Repeat. The row grows ring by ring.
Open a new ring. Thread it through the two closed rings at the newest end of your piece. Slide two more closed rings onto it. Close. That is one full unit added. Do it again. And again. A bracelet is about 12 to 14 units (roughly 20 cm, including the clasp you will add at the end). Every third or fourth unit, stop and check the mouse ears still point the same way along the whole row.
Make a second row exactly like the first.
Repeat steps 1 through 6 from scratch. Build another row of the same length, ring by ring. When you are done, lay it flat on the table next to row one. You now have two independent rows, not yet linked.
Connect the rows with one open ring.
Take one fresh open ring. At the starting end of both rows, thread the open ring through two side rings of row one and two matching side rings of row two. Four rings on one open ring. Close it. The two rows are now linked at one point. No new closed rings are added here; the connector reuses rings that are already in place.
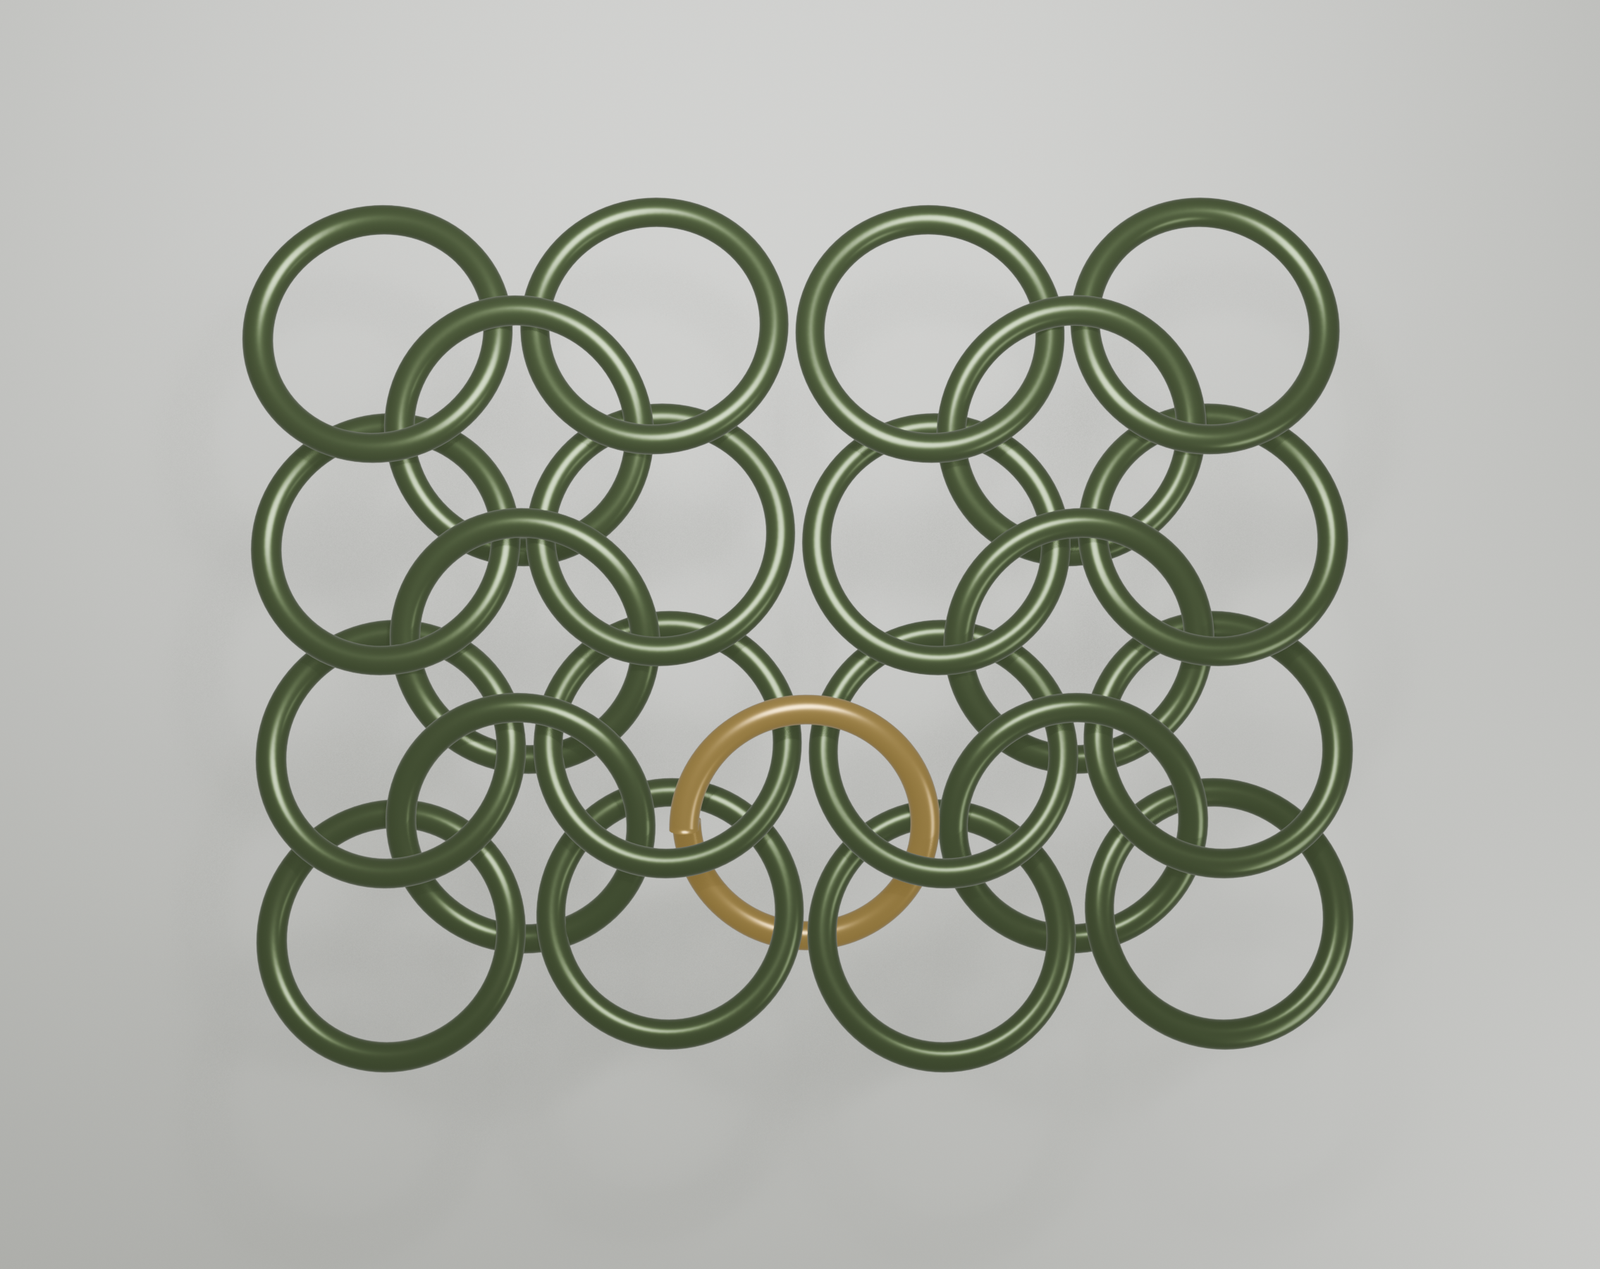
Add more connectors down the length.
Walk along both rows. At each matching pair of side rings, open a fresh ring, thread it through two rings of row one and two rings of row two, close. That is one connector. Repeat until every pair has a connector. The two rows fuse into one piece of mesh.
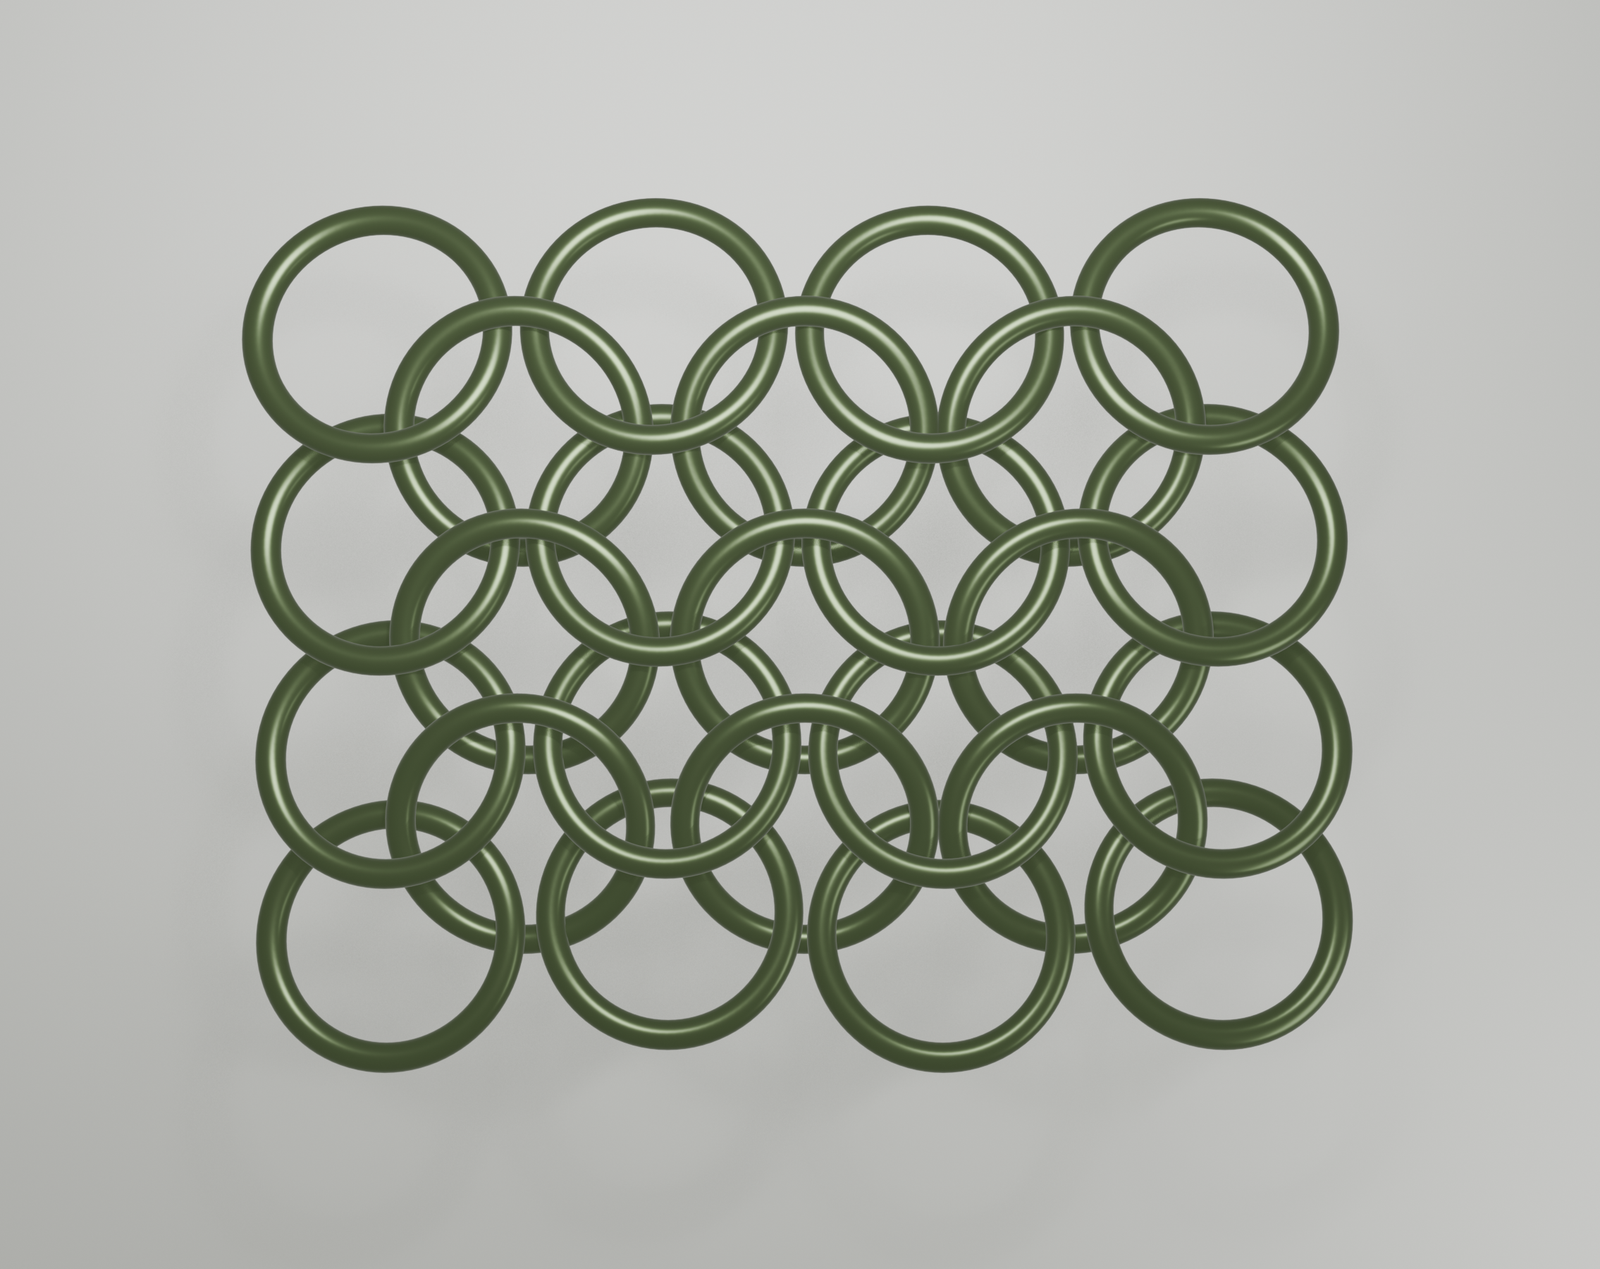
Grow until you have a piece you love.
One row is a bracelet. Three rows, a proper choker. Past that, you are in cuff and yoke territory, and if you go far enough, a mail shirt. The hauberks hanging in medieval museums are this stitch, just a few thousand more rings. Same pliers, same move you spent the last hour on.
Finished weaving?
Fixes for the usual problems
Come back here if something went wrong. Most E4-1 troubles have simple fixes once you know what to look for.
My rings won't close flush.
You opened them by pulling apart, not twisting. The ends flared outward and lost their round shape. Close them as best you can and keep going. On the next ring, twist sideways only.
The weave looks twisted.
Lay the piece flat and look for the mouse ears. Every unit should have its two closed rings slanting the same direction. If one unit points the wrong way, open the newest ring in that unit and flip the ears.
The mesh feels too loose.
At AR 5.14 the rings still have a little room to shift, which is what gives E4-1 its characteristic flex on skin. For a denser, armour-style mesh, move to 1.6 mm wire at the same 10 mm OD (AR 4.25).
My hands hurt.
Work in 20-minute sessions. Stainless steel is stiffer than aluminium or copper, and wrists notice. Warm your hands first, hold the pliers loose, let the tool do the work.
I keep losing count.
Pre-open and pre-close rings in small batches (say 20 at a time). Keep them in separate bowls. You stop thinking about prep and focus on the weave.
The ring join has a sharp edge.
The two ends are slightly offset. Grip the ring with one plier and gently push one end past the other with the second plier, then back. The scissor motion aligns them.
Easier with someone next to you.
European 4-in-1 is beginner-friendly in writing and fiddly in practice. Two hours at a table with Maria, all tools and materials on hand, and you leave with a bracelet you made yourself. We also run chainmail tables at corporate team events and bring demos to events like the Turku Medieval Fair.